

Aluminum Paint
Do Not Use On Handrails
Aluminum paint should not be used as a finish on handrails or other surfaces where hand contact will occur. The surface will mark easily and a black residue will end up on the skin if a hand is slid along an aluminum-coated surface.
Factory Ceilings
Aluminum paint is often chosen as a finish for factory ceilings. The product hides well and adheres well to surfaces that are not very clean. The drawback to using aluminum paint for this purpose is that the light reflectance is quite low, requiring more money to be spent on lighting compared to a ceiling painted white.
Heat Resistant
Aluminum paint has very good heat resistance. It can be used on surfaces that will be in continuous service up to 400 °F (200°C).
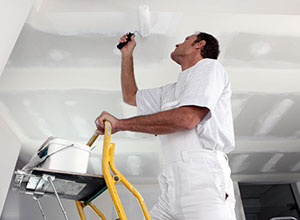
Baseboards
Essential tools and preparation advice
- Baseboards are the last thing to paint in a room. The biggest problem with painting baseboards is dirt and fluff off the floor or carpet sticking to the paintbrush. Always vacuum the floor before you start painting.
- Protect the floor with a piece of card fitted between the baseboard and the floor. Move it along as you progress around the room. Alternatively use a low tack masking tape.
Painting advice
- A good tip when painting baseboard around a fitted carpet is to only have a small amount of paint on the brush, start painting further up the baseboard, slowly working down to the carpet edge.
- You can use a wide wallpaper striping knife to gently pull the carpet back from the baseboard and then paint the area behind with the almost dry brush. That way, when you remove the stripping knife the carpet will go back and you will have a nice clean line of paint with none on the carpet.
Concrete Floors
.jpeg)
New Concrete
Before recommending a coating for a new concrete floor, it is important to know if curing membranes or concrete hardeners were used by the floor finisher. Paint does not stick well to these materials and failures usually result when they are painted over. If water beads on the surface of the floor, or acid* etching doesn't seem to work, it is likely that a membrane or hardener was used. Membranes can be removed with paint remover, but, hardeners must be mechanically removed (abrasive blasting by Blastrac™).
Muriatic Acid*
When mixing muriatic acid* with water, always add the acid* to water — never water to acid*. A lot of heat is given off when the two are mixed and this may cause foaming and/or splashing if done the wrong way around. The proper solution for acid* etching concrete is 10%. Since muriatic acid* is only 38% acid*, that means 1 part acid* to 3 parts water — not 1 part acid* to 9 parts water.
Etching
The best way to acid etch a floor with muriatic acid* is with a plastic watering can, depositing the acid* on the floor in two directions to assure coverage. Allow the acid* to work 30 minutes (or until the fizzing stops) and then flush with water to remove the salts formed by the acid* reacting with the concrete. Using a mop to apply the acid* does not give a consistent etch.
When To Paint New Concrete
Concrete floors should not be painted for at least 60 days after installation. It takes 30 days for the concrete to cure and a further 30 days for the balance of the moisture to leave the concrete.
Laitence
Concrete floors that have been finished with a mechanical float (trowel), usually end up with a scum on the surface called laitence. Laitence is a mixture of cement and sand that is loosely bound to the cement floor. It can be removed with a mixture of 1 part muriatic acid* and 3 parts water. The acid* mixture is best applied to the floor using plastic watering cans. Allow the acid* to work about 30 minutes before rinsing the floor with water. It will take at least 72 hours for the floor to be dry enough to paint. It is laitence that causes a concrete floor to be dusty. Many paint failures on floors have laitence stuck to the back of the peeling paint.
Armored Floors
Etching a concrete floor with muriatic acid* can cause armored floors(floors containing steel filings) to rust. It can also cause corrosion of electrical contacts in areas where there is a lot of electrical equipment. In both cases the problems can be reduced by using phosphoric acid* in place of muriatic acid. A 10% solution of acid* is recommended.
Testing For Moisture
Before painting a new concrete floor, it is important to know if the surface is dry. New floors take about 60 days to dry under good conditions. To test for moisture, lay a 2' x 2' piece of 4 mil plastic on the floor and seal the edges with duct tape. If no condensation appears under the plastic after 48 hours the floor is likely dry enough to paint. Grade and below grade floors without a proper vapor barrier may continue to transport moisture and never hold paint properly. For more accurate indications of moisture, an electronic moisture meter should be used.
*Important Note: Always Wear Rubber Gloves And Goggles When Handling Acid.
Did You Know?
.jpeg)
Latex Or Alkyd?
To establish if a paint on a surface is an alkyd or a latex, rub the surface with a cloth wet with xylol (or nailpolish remover). Latex paint has very poor solvent resistance and will come off on the cloth. Alkyd paint will not be disturbed by either solvent.
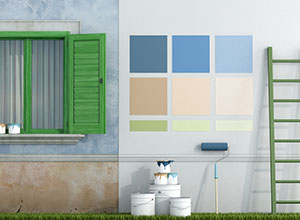
Colour Chips
Most paint manufacturers produce their colour chips in a low sheen and often the architect or owner is surprised when they see the color in an eggshell or semigloss finish because it looks different. To see what a color will look like in an eggshell or semigloss, wet the colour chip with water.
Gloss Vs. Sheen
The gloss and sheen of a paint are not the same. The gloss is measured with a 60-degree gloss meter (60 degrees from the vertical — 30 degree from the surface). The sheen is measured with an 85-degree gloss meter (85 degrees from the vertical — 5 degrees from the surface). An alkyd eggshell, for instance can have a gloss of 15 and a sheen of 35.
How Many Coats?
To establish how many coats of paint are peeling from a surface, measure the paint chips with a micrometer. The typical coat of alkyd paint applied by brush or roller is 1ó-2 mils (thousands of an inch) and the typical coat of latex is 1-1. mils. Dividing the total film thickness of the paint chips by 1.5 will give a good indication of how many layers there are, since there can be a mixture of alkyd and latex used on a surface over the years.
Computer Rooms
There is a requirement in some computer rooms to paint the floor with a conductive coating to help dissipate static electricity. Most paints like alkyds, polyurethanes, epoxies, and latex are not conductive, but are in fact insulators, so they are not suited for this purpose. There are special conductive coatings made by specialty manufacturers. (Check with your local paint supplier.)
Alkyd Primer On Drywall?
With the exception of priming drywall for the application of vinylwallcovering, alkyd primers and paints should not be applied directly to the drywall surface. The solvents in alkyd paints cause the paper nap of the drywall to be raised and the result is a very rough surface that requires substantial sanding before topcoating. Latex sealers, on the other hand, do not raise the paper nap and can be topcoated with alkyd or latex.
N.G.R. Stain
When staining and finishing hardwoods like oak, maple, and birch, consider using an N.G.R. (non grain-raising) stain. These stains dry quickly (5 minutes) because they are just color and solvent, therefore they penetrate better and can be recoated in the same day.
Light Reflectance Value
The light reflectance value of a color is a function of color only. The gloss or sheen of a product does not influence the light reflectance
Exterior Stains
To avoid lap marks when using exterior stains, try to work in the shade as much as possible. Paint only one or two boards at a time, making sure that the stain doesn't dry in the middle of a board during application. Complete the boards from side to side (horizontal siding), or top to bottom (vertical siding), before moving to the next board.
Painting Ceilings
When painting a ceiling, and there is a window in the room, keep the light source at your back and start painting away from the window. This will ensure that you will see any missed areas and reduce lap marks. Note: if there is more than one window, choose the largest one and follow the same procedure.
Lacquer Thinners
Lacquer thinners vary in quality and cost. They are usually a blend of active (solvents that are very compatible with lacquer) and inactive (filler solvents that by themselves will not dissolve the lacquer) solvent. The more active solvent in the blend, the better the quality of the lacquer thinner, the more expensive it will be and the fewer application problems you will have with the lacquer. You also won't have to use as much of it to thin a lacquer for spray application. Do not use recycled lacquer thinner for thinning lacquer. It should only be used for cleaning equipment.
Extending Working Time
When using alkyd enamels on a warm day, it is often hard to avoid brush and roller marks because the paint is "tacking up" too fast. The working time can be extended by adding PENETROL™ to the product. Usually a 10-15% addition is sufficient.
Thinning
Under some circumstances, an applicator may have to thin a product (usually for spray application). Alkyd paints can usually be thinned with solvents like V M &P Naphtha or Xylol. Alkyd quick-dry primers and topcoats cannot, on the other hand, be thinned with mineral spirits. The resins in quick-dry products require a stronger solvent like Xylol to keep them in solution. The result of putting mineral spirits in a quick-dry alkyd can be a finish that is gritty.
Dark Colors
Painting with dark colors on a hot day, or in direct sunlight can cause the paint on the surface to skin over and trap solvent in the film. As the solvent tries to escape, blisters can form in the paint. Repair of these blisters requires sanding and repainting.
Shake Or Stir?
There is a misconception that varnishes should not be shaken or stirred. Shaking varnish causes air bubbles in the can which might take overnight to dissipate. Although there is little in gloss varnishes to settle, flat, satin, and semigloss varnishes contain pigment which may settle out. Using a low-gloss varnish without at least stirring will usually cause a variation in gloss (from glossy to flat) as you get lower in the container.
New Type Of Tip Saves $
New airless spray tips are elliptical in shape, but as they are used, the hole in the tip becomes larger and changes from an ellipse to a circle. In order to maintain the spray pattern, more pressure is required. The more pressure that is used, the more overspray that occurs, and more paint than necessary is used. The price of a new tip can be recovered in saving 2-3 gallons of paint.
Doors & Frames

Remove door handles and accessories and wedge the door open so that it does not move around when you are working on it.
Essential tools and preparation advice
Rub down to remove any sheen and scrape off any loose flaking paint. If it is a glazed door, then treat the glazed section as if painting a window, then the rest of the door.
Prepare the frame and architrave at the same time. Any open joints, splits in the grain or general surface imperfections will need to be repaired with the appropriate filler.
Painting advice
Always paint in the direction of the grain to prevent streaks and finish each vertical panel with an upward stroke to prevent visible brush marks.
When painting panel doors always paint the mouldings first, then the inner panels. Next, paint the central vertical panel (mutin) and then the horizontal panels (cross rails) top, middle and bottom. Now paint the outer vertical panels (stiles) and lastly paint the edges of the door. Paint the edge nearest the door handle last, this will allow you to open and close it while working. Open the door and wedge on the non-painted side until dry.
Flush doors are painted in sections making sure you keep a wet edge, in other words don't let one section dry before it is joined to the next. The best way to paint flush doors is to divide it up into ten imaginary squares, start at the top of the door nearest the hinge, then move onto the next square at the top of the door. Blend the two areas together using horizontal strokes and then light vertical strokes, continue down the door square by square blending in the wet edges, make sure you complete the whole door in one go, otherwise a join between squares will be seen. If both sides of the door are going to be different colours, paint the edge of the door the same colour as the outside of the door. When you have finished painting the window/door, then carry on and paint the frame/architrave. You should have prepared the frame/architrave (sanded down etc.) at the same time as preparing the window/door.
Please note: The important thing to remember when applying solvent-based paints such as undercoat, gloss, and eggshell to larger areas like doors is to apply the paint evenly in small workable areas at a time, working systematically. Brush the paint in all directions first to ensure that it is even, then brush from left to right, called "cross brushing"; this ensures that all the brush marks are going the same way. Next, gently pull the brush through the paint from the bottom to the top (don't add any more paint to the brush for these 2 stages). This is called "Laying off" and it just softens out the brush marks giving a really professional looking finish that will not run because you have ensured that the paint has been evenly applied.
Exterior Coatings
Exterior Varnish
Exterior varnishes, even those with U V (Ultraviolet) absorbers must be recoated more frequently than paints. For maximum durability, a minimum of five coats should be applied to a new wood surface and annual recoating with one or two coats of varnish is recommended. The best time to recoat exterior varnish is before it looks like it needs it. If varnished wood is allowed to weather to the point that the finish has gone flat and some discolouration has occurred in the wood, complete stripping, sanding, and refinishing will be necessary.
Exterior Varnish Over Stain
It is not advisable to varnish over large exterior stained surfaces such as siding and decks. Although the finish may be attractive initially, the varnish must be recoated after a maximum of two years exposure. If recoating of the varnish is not done before it starts showing signs of breakdown, stripping will be necessary, which will remove the varnish and some of the stain. The porosity of the wood has now been effected by penetration of resin from the stain and varnish, so getting a uniform appearance with a transparent or semitransparent stain is very difficult. Uneven sheen (flashing) of solid hide stains can also result.
Alkyd House Paints
Alkyd house paints are alkyds modified with either linseed or soybean oil to make them more flexible for exterior use. This modification makes them too soft to be used as a porch paint, and if used inside they tend to yellow much more than a regular alkyd enamel.
Chalking
Chalking is part of the aging process of paint. The binder (resin) breaks down with exposure to the sun, leaving unbound pigment (chalk) on the surface. Repainting should be done before the chalking becomes excessive. In the early stages of surface chalking (in most cases five years' exposure), the film integrity is still good and all that is usually necessary before repainting, is to wash off the surface dirt and chalk.
Mildew
Good housekeeping practices are as important in the control of mildew growth as the addition of fungicides to the paint. A film or surface residue of dust or dirt can insulate the mildew spores from the fungicide and make it ineffective. Exterior painted surfaces should be washed periodically, especially in areas of the country where mildew is a problem.
Dark Colors
Dark colors can cause wood surfaces to become very hot. In the extreme, blacks and dark browns can cause cracking and/or cupping of wood in direct exposure to summer sun. Dark colors can also cause natural resins or sap in the wood to migrate or be drawn out, which can in turn cause paint to peel.
Exterior Woodwork and Metalwork
Before doing any outside work it is always a good idea to check the weather forecast and plan the work for a suitable day. Never paint wood when it is wet as the new paint will soon blister and flake off.
Never paint anything outside when it is wet, likely to rain, foggy or frosty, as all these conditions will damage the paint and the finish and masonry paints will wash off, so you will just be creating problems for yourself and wasting your time doing the work. Wait for a better day.
Essential tools and preparation advice
Start by making a plan or timetable for the work. If you do not have the necessary scaffolding such as ladders and steps, then you can hire these from a local hire shops. You may need to hire a mobile tower for areas that are difficult to reach, which will need to be booked in advance. If you have a conservatory with no means of safely getting to the surfaces above which need painting then you will need to get advice from a specialist scaffolding company.
Split the workload into sections using existing features such as bays, parapets, lintels, down pipes and window frames as natural breaks to disguise joins. The traditional way of working is to start at the top of the house with facias, soffits, bargeboards, gutters etc. and work down. However, if you are working on your own house when time allows it may be better to complete individual elevations at a time and set yourself realistic daily objectives. This way you will not get fed up with the work and the contrast between the areas finished and those not started will motivate you to keep going. Decorating is not just about nice colours it also about protecting your home and increasing its value.
The basic principles of surface preparation, order of work (start at the top and work down) and application techniques such as "Cutting in" are similar to those described for interior painting. Just the materials will be different.
The most important part of exterior decorating is the preparation. The outside surfaces take a serious bashing over the years from the weather and it is only when they are quite bad that most of us decide to redecorate.
Fillers
.jpeg)
Wood Filler
Mixing sawdust and white carpenter's glue into a stiff paste makes an excellent filler for repairing wood. It will match the existing wood surface, which is important when the finish to be applied is clear varnish. This will not work well if the wood is to be stained, because the patch will not absorb any stain.
Nonshrinking Filler
To make a strong wood filler that will not shrink and has excellent adhesion, mix sawdust and two-part epoxy glue into a stiff paste. If sawdust is not available, substitute any dry powder filler material. This filler is ideal for filling deep holes because there is no water or solvent to get trapped in the patch. The patch should be sanded within 24 hours, before the epoxy cures too hard.
Linseed Oil Putty
Linseed oil putty should not be used as a filler prior to painting. The putty dries very slowly and may bleed through the paint causing a stain. Use a commercial filler compatible with the surface and exposure.
Paintable Caulking
Paintable caulking must be allowed to dry thoroughly before it is painted. If the caulking is painted before the volatile component has evaporated, the caulking will shrink more than the paint, and the paint will crack.
Silicone Caulking
100% silicone caulking is not compatible with paint. Painting over silicone caulking will cause the paint to separate or crawl, leaving the film full of craters. Once a painted surface has been contaminated with silicone, it is very difficult to get the surface clean enough to recoat in the future. Use only latex caulking if the caulking is going to be painted over.
Paint As A Filler?....No
Paint will not fill surface imperfections such as cracks and pinholes. Although it may appear that the cracks and pinholes have been filled when the paint is wet, they appear again as the solvent evaporates and the paint drys.
Block Fillers
Block fillers should be applied to bare block only. If finish coats (especially eggshell, semigloss, and gloss alkyds) have been applied to a block wall, and there are too many pinholes, don't apply additional blockfiller at this point to try and fill them. Poor adhesion of the blockfiller will result because of the high pigment loading of the filler. Pinholes must be filled prior to the application of the first finish coat.
Latex Block Fillers
Latex block fillers are heavily pigmented latex paints. Their purpose is to fill the pinholes in concrete blocks. They rely on the surface profile of the concrete block for adhesion. Multiple coats of latex blockfillers are not recommended because of the lack of film strength at high film builds. The stress caused by the drying of topcoats (especially epoxy), can cause thick films of blockfiller to come apart, leaving blockfiller on the block and on the back of the finish coat. Block fillers are not recommended for poured concrete and will not fill the voids in concrete.
Hiding
Depends On Tio2
The hiding of a paint product (except for low-gloss/sheen products, e.g.flat, satin, etc.), is dependent on two things — the amount of titanium dioxide pigment in the product and the thickness at which the product is applied. The exception for low-gloss paints is because the filler pigments used can contribute to hiding when the paint dries.
Major Color Change
When a major change in color is going to take place, from dark to light, there is a misconception that the surface should be primed before the first coat of finish is applied. The fact is that white, white base, and even some medium-tint bases have better hiding than a primer.
How To Improve Hiding Of Deep Colors
To improve the hiding of clear-base deep colors, it is helpful if they go over a tinted primer, or in the case of latex products on drywall, use the finish coat as a primer. When tinting a primer, it is advised not to exceed 4 oz. per gallon of tinting color. Latex eggshell or latex semigloss make an ideal primer for alkyd eggshell or alkyd semigloss on drywall. You can match the color exactly and reduce the number of coats required to get complete hiding.
Interior Window Frames
The inside of windows can get a bit grubby over the years due condensation washing dust down the glass which collects in the gap between the glass and the lower glazing bar. This can often get infected with mould growth, as it is an ideal environment - wet in the morning and dry and warm during the day. This must be cleaned up and treated with a Multi-Surface Fungicidal Wash before painting.
Essential tools and preparation advice
The window frame must be clean, sound and dry. Scrape back any loose, flaking paint to a firm edge. It is important to clean out all cracked and defective putty between the glass and the frame. It tends to become brittle with age and can fall out. Scrape out all the loose material using a suitable tool. Either a triangle shaped Shave Hook or a small Chisel Knife (like a small wallpaper stripping knife) will be ideal. If you invest in a few basic, good quality tools and look after them, they will last you a lifetime.
You will need to fill any gaps around the glass before you can paint the window, using a suitable Multi-purpose Putty. Use a proper Putty Knife for this purpose. Get a small amount of the putty in your hands and roll it into a small ball to get it nice and pliable. Press the putty into the gap using the putty knife and smooth off and remove the excess. Leave the putty to harden thoroughly before painting.
Once all the preparation is done and the existing paint has been sanded down and dusted off (always wear a suitable face mask when dry sanding), any areas of bare wood must be primed.
Painting advice
When applying the paint to normal opening Windows, it's best to paint in the morning to maximize the drying time. Depending on drying conditions this will enable you to close the windows at night. If you can, remove the stay and catch before you paint the window (leave in a screw to use as a makeshift handle whilst painting).
Window frames should be painted in a certain order to achieve the best results. Also, this will make painting the window easier.
- Glazing bars
- Top and bottom horizontal rails
- Inside vertical rails
- Outside edges
- Outside frame
"Cutting in" around the glass in windows is a lot easier than most people think and it is a lot better than using masking tape or paint shields. You can buy special, small paint brushes that have bristles with an angled edge. These are ideal for any cutting in job. Don't over-load the brush with paint, hold it like a pen and start from one corner to paint a straight line. Start just below where you want the edge to be and slowly work the paint up to the required line. Never have too much paint on the brush at a time, as this is when it goes everywhere. If the edge is not quite straight then you can simply go over this area again to even it out. If you find that the paint has gone too far up the glass, then simply get a wallpaper stripping knife and pull a piece of clean, lint free cloth tightly over the end and use this to carefully wipe off the excess paint. If you take a bit too much out then just cut in that area again. The important thing is to work slowly and carefully. The more you practice the better and quicker you will become. This technique applies to any cutting in.
The alternative is to spend ages sticking masking tape all over your windows and hope that you have got it straight. When you remove the tape there is the risk of pulling more paint off than you intended!!
Sash windows can be a little more awkward to paint than normal opening windows, but following the sequence described below will enable you to get a good result: Slide the outer sash down a little and raise the inner sash slightly, leaving a gap top and bottom.
Paint the glazing bars and the surfaces of the inner sash including the top surface of the meeting rail and the underside of the bottom rail. Then paint what you can see of the outer sash, including the face (but not the underside) of the meeting rail.
Now slide the outer sash up, but not quite closed, and lower the inner sash by gripping it from the outside so that you don't touch the wet paint. You can now complete the painting of the outer sash, omitting the top surface of the top rail. Ideally you should leave the sashes in this position until dry.
Pull the sash cords out when you are painting behind them (painting the cords will effect how well they work and how long they last); paint the pulley housing but not the pulley itself, otherwise it will jam and the sashes will not run easily. This all sounds a bit complicated but if you look at the window first and practice moving the outer and inner sashes as described it will all make sense.
If the window has been painted badly in the past and does not open it will require a lot of work to sort it out. This is when it is worth paying a specialist sash window company to refurbish them properly. If you have a period house it is worth the cost and effort, as the original windows will always add value to the house.
Painting old metal window frames is much the same as for wood except that you prime any bare areas with Dulux Primer. When filling the gap between the glass and metal frame, make sure that you use a Multi-purpose Putty suitable for both wood and metal. Please note that this advice does not apply to Anodized Aluminium (the metal replacement double glazed windows), as these cannot be painted.
Miscellaneous Metals
Brass & Copper
Brass and copper can be painted without priming if an alkyd topcoat is used. If painting with latex, use an alkyd primer first. If exposed copper has turned green, the copper should be cleaned with phosphoric acid to remove the green patina before painting.
Anodized Aluminum
Anodized aluminum is very difficult to paint. The surface is a corrosion resistant oxide layer that alkyd and latex paints won't adhere to. Vinyl wash primers and epoxy paints perform better, but a spot adhesion test should be done first.
Stainless Steel
Stainless steel can be painted with epoxy-polyamide paints. Brush blasting to provide a surface profile is highly recommended before painting.
Painting Steel
Mill Scale
One of the most common causes of paint failure on exposed exterior steel is painting over mill scale. New steel is covered with an oxide layer, that has a different expansion rate than the steel underneath, which will crack as the steel goes through expansion and contraction. Moisture enters the cracks, causing rusting between the steel and mill scale, causing the mill scale to delaminate, taking the paint with it. The only way to remove mill scale is by abrasive blasting.
Anchor Pattern
The sandblasting profile (anchor pattern) on steel should be about 25% of the thickness of the paint that will be applied and should not exceed the thickness of the primer. If the anchor pattern is 1.5 mils and the thickness of the primer is less than that, the peaks of the sandblasted steel will be above the primer. Flash rusting of the steel could occur before the next coat is applied.
Sandblast
The surface profile of a sandblast on steel is determined by the grit size and not the speed at which the blast hose is moved. The slower the blast hose is moved, the better the grade of cleaning, but the profile remains the same.
Rusty Surfaces
Painting over a rusty surface is seldom a good idea. Many coatings are available today that are recommended for application to a mildly rusted surface, but their performance is dramatically improved with better surface preparation. Paints don't usually penetrate through rust (especially rust scale) and paint performance deteriorates with the degree of rusting. It is poor painting economics to invest in a good paint system and put it over a rusty surface.
Peeling
.jpeg)
Moisture
The maximum moisture content for any surface that is to be painted is 12-14%. Painting a surface that contains a higher level of moisture can lead to peeling problems. The only accurate way of determining moisture content is with an electronic moisture meter.
Too Many Coats
There is a limit to the number of coats of paint that a surface can support. As the paint thickness builds up over time, and the coatings get older, they lose their flexibility. As the substrate (surface) expands and contracts because of temperature fluctuations or moisture, the paint film is no longer flexible enough to move with the surface. Cracking or flaking of the coating usually results. It is not uncommon to put a coat of paint on a surface that appears sound only to have many layers of paint peel away. At this point the surface must be stripped.
Efflorescence
Efflorescence is a white deposit that forms on masonry surfaces. Moisture moving through masonry will pick up water-soluble salts which are left behind when the moisture reaches the other side. The moisture moving through the masonry can pass through a flat paint, but the efflorescence builds up behind the paint until it causes peeling. To solve the problem, the moisture migration must be stopped first and the efflorescence brushed off, before repainting is done.
Exterior Walls (Previously Painted)
If your exterior walls have been painted then they will need to be maintained. This is a big job that requires a lot of planning and thought before you start to ensure that you have all the necessary tools and equipment before you start. A high level of surface preparation is essential if the job is going to look good and last a long time.
Essential tools and preparation advice
- If the surface is very bad then it may be necessary to wash some of it down first with a detergent solution to remove dirt, grease etc. Obviously this is not an easy thing to do on the outside of a house, but it will help give the best results. Rinse off with clean water and allow too dry.
- Carefully scrape back to a firm edge all areas of poorly adhering or defective coatings and rub down thoroughly to "key and feather" broken edges of existing coatings. Don't use a wire brush as bits of the wire may break off embedding themselves in the surface, which may rust when the water-based paint is applied. Treat any areas affected by mould, lichens, algae and moss with Fungicidal Wash. Make good minor defects with an appropriate filler.
- New or sound bare surfaces should be sealed with a Dulux Primer first (smooth or textured) to ensure good adhesion of the finishing coat(s). Surfaces that remain powdery, friable or chalky after thorough preparation should also be sealed with a coat of Dulux Primer.
Painting advice
If your walls have never been painted then you need to think very carefully about what you are doing if you decide to paint them. Once painted they must be maintained and it is very expensive and difficult to go back if you change your mind. Professional blast cleaning is the only way to do it. Also, a lot of bricks can't be painted such as Fletton or Common Bricks. Always seek professional advice if in doubt.
- Stripping Wood: There is no need to strip existing paint coatings unless they are in a very bad state. It is always better to continue painting and build up the surface than to start again from bare wood
- If you do have to strip down to bare wood, using a paint stripper will help make the job easier.
Priming & Sealing
New Plaster
Although new plaster can be primed with latex sealer, it is recommended that large plaster surfaces be primed with a properly formulated alkyd wall primer & sealer. Latex does not penetrate the plaster surface and if the plaster is powdery, over-trowelled, or if the plaster mix isn't quite right, poor adhesion of the latex can result. But, whichever you choose, alkyd or latex, the moisture content of the plaster must be below 14% prior to painting or failure can result.
Good Adhesion
When recoating a gloss or semigloss alkyd paint with the same finish, priming the old paint with an alkyd primer is not a good idea. Good painting practice dictates that the surface should be clean and deglossed by sanding prior to painting. The new alkyd finish coat will have better adhesion to the old coating than an alkyd primer will. Primers perform best on new or bare surfaces. You will, however, want to use an alkyd primer over an existing alkyd enamel, if the new finish coat is latex. The alkyd primer will improve the adhesion of the latex finish coat.
Liquid Sandpaper
Although sanding is the preferred choice to prepare a surface, liquid sandpapers are sold to improve adhesion when repainting an old, hard, glossy surface. These products are generally solvent blends that soften the paint surface for a short period. If used, the surface should be painted within 15-20 minutes of wiping down with liquid sandpaper, so only do small areas at a time. Liquid sandpapers are not very effective if the new finish coat is latex paint.
Textured Ceilings
Most texture sprays used on ceilings are sensitive to water but not sensitive to solvent. If the first time the texture is painted, a latex is used, the perimeter area cut in with a brush must be allowed to dry thoroughly before proceeding with rolling the remainder of the surface. If this is not done, and you roll into an area that has been softened by the water in the paint used to cut in, areas of texture may peel back to the primed drywall. This problem does not occur if you paint a textured ceiling the first time with alkyd flat. Future repaints can be done with alkyd or latex.
Asphalt Residue
Surfaces that have asphalt residues on them are difficult to paint. These surfaces include concrete floors where a residue of tile adhesive remains, or, an exterior wall coated with asphalt water proofing, that becomes an interior wall in a building addition. The asphalt will bleed through most solvent-based coatings. You can prevent bleeding by priming the surface with traffic paint or a shellac-based primer/sealer before the topcoat is applied. A spot test is recommended before proceeding.
Sanding
When sanding between coats of paint, the grit of the sandpaper is important. If the grit is #80 or less, it is possible to scratch the surface and the scratch marks will show through the next coat of paint. If the grit is too fine, the sandpaper will plug up. #120 grit is about right for sanding between coats of paint.
Steel / Aluminum / Vinyl Siding
When painting metal siding, use an exterior alkyd primer first - use the primer recommended for the topcoat you will be using. Depending on the factory finish used on the metal siding, it can be difficult to repaint unless it is somewhat weathered. The surface must be clean and free of "chalk" before priming. On vinyl siding, do a test patch for adhesion before proceeding, and then make sure that the color change is not too great. Dark colors absorb a lot of heat, and distortion or twisting of the vinyl siding can occur. Generally speaking it's wise to avoid going deeper in color than the original.
Galvanized Surfaces
Alkyd paints should not be applied directly on galvanized surfaces. Over time, alkyd paints can form acids which react with the zinc surface to form zinc soaps. Although the paint may have good adhesion initially, peeling usually results. Galvanized metal primers are formulated to prevent the formation of acids on aging. When investigating a peeling complaint on galvanized metal, one way to tell if a proper primer was used is to rub your finger on the side of the paint chip that was in contact with the galvanized surface and then smell your finger. The reaction product of the acid and zinc has a pungent odor.
Galvanized Metal
Galvanized metal panels that are used for ceilings and walls in commercial buildings are treated during the manufacturing process with chromates or oil to prevent the formation of "white rust". White rust is the stain that appears on galvanized panels when stored in a humid environment. These chromates or oil interfere with paint adhesion, especially if the exposure is going to be damp, in buildings such as arenas and swimming pools. The chromates should be removed by abrasive blasting and the oil removed with a solvent or detergent wash prior to painting. Vinyl wash primers in particular should not be applied over chromates.
Painting Over Vinyl Wallcovering
Rather than stripping 54' vinyl wallcovering in a commercial building, it is often painted when it becomes soiled or a color change is desired. If the surface is dirty, it should be washed with T.S.P. and then rinsed. If the topcoat is latex, it can be applied directly to the vinyl without a primer. If the topcoat is alkyd, a latex primer must be used first. Plasticisers in the vinyl can cause drying problems with alkyd paints if a latex primer is not used.
Before Installing Vinyl Wallcovering
Latex sealers are not recommended on drywall under vinyl wallcovering. Latex paint will not penetrate into the paper face of the drywall and tends to sit on the surface. Down the road, when the vinyl is stripped, it is likely that the paper face of the drywall will be damaged and/or peeled off. Alkyd paints, on the other hand, penetrate the paper face of the drywall, making it strong enough to withstand the stress of the vinyl being pulled from the surface.Traditionally, latex sealers are not recommended on drywall under vinyl wallcovering. Latex sealers do not provide ample barrier protection to the drywall surface from the wallcovering adhesive. Therefore, the wallcovering adhesive could penetrate through the latex sealer and bond directly to the paper face of the drywall. Thus, when the vinyl is stripped, the paper face of the drywall will be damaged and/or peeled off.
Alkyd paints, on the other hand, penetrate the paper face of the drywall and create a barrier to prevent the wallcovering adhesive from penetrating through it. Making it strong enough to withstand the stress of the vinyl being pulled from the surface. However, in recent years, wallcovering adhesive manufactures have reformulated their products to be higher solids and therefore less penetrating. Some of the newer generations of wallcovering adhesives are not compatible with alkyd primers or paints. Therefore, before installing any vinyl wallcovering check the adhesive manufacturer for the recommended primer type.
New Drywall
Before painting new drywall, check to see if the drywall was sanded with a sandpaper that was too coarse, leaving scratch marks in the taping compound or cutting through the paper face of the drywall board near joints or patches. The scratch marks will show through several coats of paint and, if the paper face of the drywall was roughed up, it will create a surface texture that is hard to get rid of. In many cases these defects will not be visible until the surface is primed. The defects must be repaired before the topcoat (especially alkyds) is applied.
Shellac
Shellac is often used as a sealer for knots in wood and as a fast dry clear finish. It is available in both an orange and white product. The orange is a better knot sealer than the white product. Shellac that is old should be checked to make sure it will still dry, because it loses its drying properties with age. Shellac should never be used under polyurethane varnishes since it will cause the polyurethane to peel, usually after a few months.
How To Remove Mildew
To remove mildew from a painted surface, wash the surface with the following mixture:
- 2/3 cup trisodium phosphate
- 1/3 cup detergent
- 1 quart chlorine bleach
- 3 quarts of warm water
Rinse the surface well with clean water after washing. Please wear appropriate safety equipment (rubber gloves and eye protection) and....protect shrubbery and plants with plastic sheeting.
Stains
If you have stains bleeding through a paint film, they can usually be stopped by switching the type of paint being used. Stains that are water soluble are generally not solvent soluble and stains that are solvent soluble are generally not water soluble. If in doubt, you can always use a "Brand Name" stain sealer.
Acoustical Surfaces
Acoustical surfaces that are designed for noise control, such as ceiling tiles, can be painted with flat paints without substantial reduction in acoustical properties. The use of eggshell, semigloss, and gloss paints, should be avoided because they have good sealing properties. The difference in acoustical properties between alkyd flat and latex flat is minimal.
Radiators
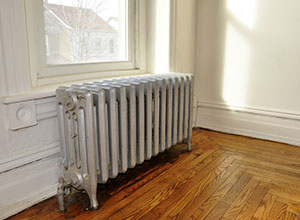
Painting advice
- Radiators should be turned off and only painted when completely cold. The longer you can leave them turned off for the paint to thoroughly dry the better.
- Traditionally a solvent-based paint is used on radiators and other heated surfaces but now some of the latest generation of water-based paints can also be used. Read the can instructions before use to see if the paint is suitable.
- A good tip when painting radiators is to paint them the same colour as the wall. That way they blend into the wall rather than standing out as a less than attractive feature.
Technical Facts
.jpeg)
Temperature
Paint and varnish removers work better in warm temperatures. They are not very effective below 50°F (10°C).
High Humidity
High humidity can affect the way paints dry, especially at temperatures that are below 50°F (10° C). High humidity can interfere with the supply of oxygen necessary for the curing of alkyd paints and can delay the tack-free time from hours to days. With latex paints it is possible for the evaporation of water to be slowed as the paint dries. If the coalescing solvent (film forming glycol) evaporates before the water leaves the film, you will end up with a paint film that is weak or can crack and/or peel.
Corrosive Environment
The more corrosive the environment, the higher the film build of a coating should be to protect a surface. For immersion service, the minimum requirement is 10 mils dry, applied as two or three coats of 3-5 mils each. Interior coatings on walls are usually for appearance only, so 3-4 mils is sufficient. Moderate exposure, such as the exterior of a steel water tank requires 6-8 mils for protection.
Film Thickness
Three coats at 9 mils total film thickness is better than two coats at 10 mils. The three-coat system reduces the chance of misses, pinholes, and solvent entrapment. It is more expensive however, because of labour costs to apply the extra coat.
Painting Steel Surfaces
When painting steel surfaces during periods of cold nights and warm days, it is important to know the dew point temperature and the temperature of the steel. As the temperature and humidity climb during the day, it is possible for the steel to sweat from condensation, much the same as a cold drink taken out of the refrigerator. To guard against painting over condensation, the steel must not be painted if it is within 5°F (3°C) of the dew point. To establish the dew point, a sling psychrometer is required.
Spreading Rates
To establish the theoretical spreading rate in square feet for a liter of paint, you multiply 423.8 times the solids by volume of the product and divide by the recommended dry film thickness. If the solids by volume is 50% and the recommended dry film thickness is 2 mils, the theoretical spreading rate is 423.8 X 0.5 divided by 2 or 105.9 square feet per liter. Theoretical spreading rates do not allow for waste or surface profile (texture).
Temperature
Because water doesn't freeze until the temperature drops to 32°F (0°C), some painters feel that latex paints can be applied down to that temperature. This is not true for all products, because the minimum temperature required for standard latex paint to dry properly is 50°F (10°C). Standard latex paints applied to surfaces below 50°F will form films that are weak and will result in early failure of exterior products and poor washability of interior products.
In colder weather conditions, use our premium line of Dulux Diamond Exterior products that can be applied at temperatures as low as 36°F (2°C). Check with your local Dulux Paints store to find the product that is right for you and your working conditions.
Application Problems
Topcoats applied over inorganic zinc tend to pinhole because of the voids in the zinc film. Pinholes can be reduced by using a vinyl wash primer, which is very thin, as an intermediate coat to fill the voids. If vinyl wash is not going to be used, the first coat of finish over the zinc should be reduced 50%, and a light coat applied.
Speeding Up Dry Time
Alkyd paints take longer to dry as the temperature drops. Dry time cannot be speeded up by the addition of a fast evaporating solvent such as Xylol. The fast solvent comes out of the paint quickly but the slower solvents like mineral spirits come out at the same speed they normally would. Japan Driers can speed up dry, but do not exceed the recommended levels on the container — wrinkling may result.
Spray Application
Vinyl and chlorinated rubber paints tend to "cobweb" when sprayed in warm weather. Cobwebbing (the paint comes out of the gun dry like a cobweb) can be reduced by using a warm weather reduction solvent (slower evaporating) or thinning the product with extra xylol.
Spray Application
Dry fog paints are formulated so that the overspray lands as a dry dust after an 8-10-foot fall if the temperature is 70°F (20°C). When the temperature is cool, say 50°F (10°C), the dry is slowed and the overspray particles are dry on the outside and wet in the middle. Pulling equipment or walking through the overspray when conditions are cool can cause the particles to break open and the paint will stick to the floor. When using dry fog in hot weather the dry time is accelerated. Care must be taken that the paint being applied lands wet on the surface being painted, to ensure good adhesion. Dry fog paints dry quickly, and if the paint is partially dry when it hits the surface being painted, poor adhesion will result.
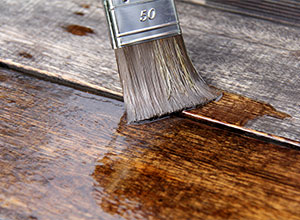
Wood Finishing
If open-grained wood, such as oak or mahogany, is going to be filled with paste wood filler and stained before a clear finish is applied, mix the wood filler and the stain together and combine the staining and filling operations. If the wood is filled before it is stained, the wood filler will not accept the stain the same as the wood and will appear as a lighter color.
Temperature

Service Temperatures
The maximum service temperature for paints is: Alkyd and latex - up to 200°F (90°C)
Epoxy - up to 300°F (150°C)
Aluminum - up to 400°F (200°C)
Inorganic zinc - up to 750°F (400°C)
High Temperatures
Latex gloss and semigloss paints are affected by high temperature and high humidity even when they have been on a surface for some time. At temperature and humidity extremes, the coating will soften and become sticky to the touch. This "thermal tack" will disappear when temperature and humidity conditions are reduced. Thermal tack will cause these products to stick to door weather-stripping, so you should not use latex gloss and semigloss for entrance doors.
Viscosity
The viscosity, or body of a paint is affected by temperature. Paint gets thick when cold and thin when hot. Paint left in a car trunk and allowed to get hot or cold (depending on the time of year) must be brought back to 70°F-77°F (20-25°C) before it is used. Cold paint has poor flow properties and tends to sag because it goes on too thick. Warm paint tends to have poor coverage because it goes on too thin.
Walls & Ceilings
Painting the walls and ceilings of your home is a big job that needs thinking about before you start. The correct order for painting any room is to start with the ceiling, then the walls and finally the woodwork and metalwork such as radiators and pipes. Always plan your work and work systematically, that way you will not miss bits, which will show up when the paint is dry.
Essential tools and preparation advice
Before you start applying any paint you need to think about how you are going to reach the surface safely and comfortably, balancing with one foot on a chair is not the way to do it!! You will need to have the room as clear as possible and any remaining furniture pushed to the centre of the room and protected by dropcloths. Carpets will also need protecting with dropcloths. If you do not own a suitable ladder then you can rent one from a local rental shop. There are lots of variations available now; some will fold out into a working platform, which is ideal for painting large areas like ceilings.
You will need to consider the surface that you are painting - is it textured with stucco or smooth plastered? This is important as it affects your choice of roller and the level of surface preparation that you will need to do. Textured stucco ceilings can become powdery and dusty when old, particularly if they have never been painted. In this case you will need to seal them with an alkyd paint first. Smooth plastered ceilings often have cracks in them, which will require filling with the appropriate filler. There are lots of different types, so take some time and decide which one is best for you.
Painting advice
Once you have sorted out the access and preparation details, you need to consider the type of paint that you are going to use. Do you want a matt/flat, eggshell, semi-gloss or gloss? Matt is often the best choice as it helps to diffuse surface imperfections.
When painting ceilings, start painting in one corner and paint the edge in as you go rather than going all round the room first with the brush, which is what a lot of people do. This results in the paint drying before you roller the main area and that can show up as a banding effect. Apply the ceiling paint down about 2cm onto the wall with the first coat, that way when you apply the wall paint later, you only have to "cut in" to the ceiling line with the wall colour. This makes it much easier to get a neat line.
The process for painting walls is just the same. Cut in around switches and sockets as you go and don’t worry about going over the baseboard and doorframes a bit with the paint.; Again it makes it easier to get a nice, neat line with the trim paint later.
The process of cutting in is much easier than people think. You can buy paint brushes that have bristles with an angled edge, which are ideal. Don't over-load the brush with paint, hold it like a pen and start from one corner to paint a straight line. Start just below where you want the edge to be and slowly work the paint up to the required line. Never have too much paint on the brush at a time, as this is when it goes everywhere. If the edge is not quite straight then you can simply go over this area again to even it out. If you do go onto the finished ceiling with the wall paint, wait till it has dried and then do the same process with the ceiling paint, to even up the line again. You don't need to do the whole ceiling again, you are just "touching in" the bit of wall paint that has spread onto the ceiling.
Don't be tempted to use masking tape as all that will happen is the paint will creep under the edge of the tape and when you pull it off, some of the previous paint will come with it and you are back to square one again with patches of bare plaster. Once you have practiced cutting in with a brush you will be surprised just how easy it is to get good results. The important thing is to take your time and work carefully.
If you want to paint the wall behind your radiators, rollers are ideal if you don't want to take it off the wall. They can also be used for other difficult to reach areas.
Wood
.jpeg)
Sanding
There are two reasons for sanding wood prior to staining. The most obvious reason is to make the wood smooth, but another important reason is to increase the porosity of the wood and make the penetration of the stain more uniform — especially with transparent stains.
Wood Decks
Wood decks are commonly painted or stained after they have been constructed. After construction, the sides and bottom of the wood cannot be coated properly. Many failures on decks are caused by moisture entering the wood through the sides and bottom. Moisture seldom leaves these surfaces the way it entered. The sun shines on the coated surface and the moisture tries to come out through the paint or stain which causes peeling. To improve the resistance to moisture, the coating should be applied to all surfaces prior to construction.
Painting Over Varnish
Adhesion of most paints to varnish is poor. Although deglossing by sanding with #120 grit sandpaper can help adhesion, paints applied over varnish usually chip easily. For best results, strip off the varnish with paint remover and then prime with an alkyd primer before topcoating with alkyd or latex.
Pressure-Treated Lumber
Pressure-treated lumber is kiln-dried wood (usually spruce or yellow pine) that is pressure treated with chemical preservatives dispersed in water. To check if the wood is dry enough for stain or paint, put water drops on the surface. If it soaks in, it’s ready. When the wood is dry, it can be painted or stained like any other wood surface. Pressure-treated wood that is not painted or stained will weather, crack, and check as badly as untreated wood over time.
Sun Damage
Wood that has been exposed to the sun for more than a month should be sanded before painting — especially if the wood has started to turn grey. Sunlight causes the wood fibers to "chalk" and erode unevenly. They then form a weak surface layer that has poor adhesion to the wood surface, which can cause the paint to peel. To see how much sun damage has been caused to the wood surface, press a piece of tape on the surface, rub the back of the tape to ensure good contact, and then strip off the tape. If there are a lot of wood fibers on the back of the tape, the wood needs sanding before painting.
Plywood
Grain cracking in plywood is caused by moisture cycling in and out of the top veneer. If plywood is going to be painted with latex paint or stain, two coats of exterior alkyd or high-quality acrylic primer are recommended first, in order to reduce the chance of cracking. Never use semitransparent stain on plywood. It does not provide enough protection from moisture and the plywood will crack and check.
.jpeg)